


How to Decorate Your Home with Baroque Furniture
Decorating your home with baroque furniture is a journey into a world of opulence, grandeur, and timeless elegance. Rooted in 17th-century European design, this style is characterized by intricate carvings, dramatic contrasts, and luxurious materials. When executed thoughtfully, it can transform any living space into a regal sanctuary that reflects sophistication and historical depth.
In this comprehensive guide, you’ll learn how to incorporate baroque furniture into your home without overwhelming your space. Whether you’re working with a full-fledged restoration or just adding a touch of classical charm, these strategies will help you achieve a balanced, cohesive, and elegant interior.
Understanding Baroque Furniture
A Brief History
Baroque design originated in Italy in the early 1600s and quickly spread throughout Europe. It was commissioned by the aristocracy and the church to symbolize power, grandeur, and divine order. Over time, the style evolved but retained its core attributes: dramatic aesthetics, ornate detailing, and the use of high-end materials.
Key Characteristics
- Intricate carvings often depicting foliage, cherubs, or scrollwork
- Rich, dark woods like mahogany, walnut, and oak
- Gilded finishes with gold or silver leaf accents
- Luxurious upholstery in velvet, brocade, or damask
- Large, dramatic silhouettes with curved lines and cabriole legs
Understanding these traits is crucial before selecting or styling any baroque furniture piece.
Planning Your Interior Design
Choose a Theme
While baroque furniture is inherently bold, it can work in both traditional and modern settings. Choose from the following themes to guide your decorating approach:
- Classic European Elegance: Full baroque style, rich color palettes, and antique pieces.
- Modern Glam: Mix modern minimalism with baroque statement furniture.
- Eclectic Fusion: Blend baroque items with boho or contemporary elements for a curated look.
Establish a Color Palette
Typical baroque interiors feature rich tones like burgundy, gold, emerald, and deep blue. For a modern take, balance these with neutral backgrounds such as cream, gray, or soft taupe.
Choosing the Right Baroque Furniture Pieces
Sofas and Armchairs
These are focal points in any room. Look for:
- Deep, plush seating
- Button-tufted upholstery
- Curved wood detailing with gold accents
Coffee Tables and Consoles
Ornate yet functional, ideal pieces will have:
- Marble tops or mirrored surfaces
- Scrolled legs and floral motifs
- A balance between drama and usability
Beds and Headboards
A baroque bed is a true statement:
- Oversized tufted headboards
- Gilded carvings
- Luxurious linens and curtains
Dining Tables and Chairs
To impress guests:
- Long tables with heavy pedestal bases
- Upholstered chairs with carved wood frames
Balancing Baroque with Modern Elements
Avoid Overcrowding
Baroque elements are visually heavy. Choose one or two standout pieces per room to maintain elegance without visual chaos.
Use Negative Space
Let your baroque furniture breathe. Blank walls and uncluttered floors make ornate pieces stand out more.
Pair with Modern Accessories
Sleek mirrors, abstract art, or minimalist lighting fixtures can create harmony between the old and the new.
Incorporate Contemporary Materials
Combine baroque shapes with modern materials such as acrylic or metal to keep the aesthetic fresh.
Room-by-Room Styling Tips
Living Room
- Use a baroque sofa as the centerpiece
- Add a gilded mirror above the fireplace
- Complement with velvet curtains and a Persian rug
Bedroom
- Choose a majestic headboard
- Use mirrored nightstands for added glamour
- Opt for a chandelier to emphasize vertical space
Dining Room
- Go for a large, dark-wood dining table
- Match with upholstered chairs in a regal fabric
- Add a baroque-style sideboard for storage and display
Entryway
- Set the tone with a carved console table
- Hang an ornate mirror or framed oil painting
- Use a classic pendant light for ambiance
Lighting and Accessories
Chandeliers
Baroque lighting is all about drama. Crystal chandeliers or gold-finished ceiling fixtures add an unmistakable elegance.
Curtains and Drapes
Use heavy, floor-length fabrics like velvet or brocade. Tassels and fringe are welcome details.
Wall Art and Decor
- Oil paintings in gilded frames
- Baroque-style clocks or sculptures
- Tapestries with mythological or pastoral themes
Rugs
Go for rich patterns and deep hues to ground the space and tie in the furniture.
Common Mistakes to Avoid
Going Overboard
Too many baroque furniture pieces can turn your home into a museum. Stick to a few key items.
Ignoring Scale
Ensure that your rooms can physically and visually accommodate larger, ornate pieces.
Skipping Maintenance
Baroque furnishings often need careful cleaning and occasional touch-ups to maintain their appeal.
Where to Buy Baroque Furniture
- Antique Shops and Auctions: Ideal for authentic, historical pieces
- High-End Furniture Stores: Modern recreations with updated durability
- Online Retailers: Etsy, 1stDibs, and Chairish offer a wide selection
When buying online, always check reviews and verify authenticity when possible.
FAQs: Decorating with Baroque Furniture
Is baroque furniture suitable for small spaces?
Yes, but sparingly. Use one or two statement pieces and keep the rest of the decor minimal.
Can baroque furniture work with minimalist interiors?
Absolutely. A single baroque furniture piece can act as a focal point, adding character to a minimalist room.
How do I clean and maintain baroque furniture?
Use a soft, dry cloth for regular dusting. For wood, occasionally apply a quality polish. Upholstery should be vacuumed regularly and spot-cleaned with gentle cleaners.
What colors work best with baroque furniture?
Rich jewel tones like emerald, burgundy, and gold work best. Pair with neutrals to prevent visual overload.
Is it worth investing in baroque furniture?
Yes. High-quality baroque furniture is not only visually stunning but can also increase in value over time, especially antique pieces.
Final Thoughts
Decorating your home with baroque furniture is an art that balances extravagance with restraint. By understanding the historical context, choosing the right pieces, and thoughtfully integrating them into your space, you can achieve a luxurious interior that stands the test of time. Let the elegance of the Baroque era inspire you to create a home that’s both regal and inviting.
Whether you’re a seasoned interior designer or a homeowner with a passion for history and elegance, embracing baroque furniture can elevate your space to a level of unparalleled sophistication.

Step-by-Step Guide to Building a DIY Swing Bed
Introduction
A DIY swing bed is a perfect addition to any outdoor space, offering a cozy retreat for relaxation. Whether placed on a porch, patio, or under a tree, a swing bed adds charm and comfort. This guide will walk you through building your own swing bed using basic tools and materials.
Materials and Tools Needed
Materials:
- Wooden boards (cedar, pine, or pressure-treated lumber)
- Wood screws and nails
- Heavy-duty rope or metal chains
- Eye bolts and carabiners
- Wood glue
- Sandpaper
- Stain or paint (optional)
- Outdoor mattress and cushions
Tools:
- Measuring tape
- Saw (circular or miter saw)
- Drill and drill bits
- Screwdriver
- Sander or sandpaper
- Level
- Paintbrush (if staining or painting)
Step 1: Measure and Cut the Wood
- Determine the size of your swing bed. A standard twin mattress (39” x 75”) is a common choice.
- Cut the wooden boards for the frame: two long side pieces and two shorter end pieces.
- Cut additional slats for mattress support.
Step 2: Assemble the Frame
- Lay out the cut boards to form a rectangular frame.
- Secure the corners with wood glue and screws for added stability.
- Attach support slats evenly across the frame using screws or nails.
- Ensure the structure is sturdy and level.
Step 3: Sand and Finish the Wood
- Use sandpaper or a sander to smooth all rough edges.
- Apply stain or paint to protect the wood from outdoor elements.
- Let it dry completely before proceeding.
Step 4: Attach Hanging Hardware
- Drill holes into each corner of the bed frame for the eye bolts.
- Secure the eye bolts tightly to ensure they can support the weight.
- Attach heavy-duty rope or metal chains to the eye bolts using carabiners.
Step 5: Install the Swing Bed
- Choose a sturdy overhead support structure, such as a porch ceiling or strong tree branches.
- Drill corresponding holes and install eye bolts into the overhead support.
- Securely attach the ropes or chains to the ceiling hooks, ensuring even suspension.
- Test the swing bed’s stability before use.
Step 6: Add Cushions and Enjoy
- Place an outdoor mattress or cushions on the swing bed.
- Add decorative pillows and blankets for extra comfort.
- Enjoy your new DIY swing bed with a book or a relaxing nap!
Safety Tips
- Always ensure the support structure can handle the weight of the swing bed and occupants.
- Use weather-resistant materials for outdoor durability.
- Periodically check bolts and ropes for wear and tear.
Conclusion
Building a DIY swing bed is a rewarding project that enhances your outdoor space. With the right materials, tools, and patience, you can create a stylish and comfortable retreat perfect for relaxation. Start your project today and enjoy the beauty of a handcrafted swing bed!

18 Irresistible Cutting Board Display Ideas for Your Home
Introduction
Cutting boards are more than just kitchen essentials—they can also be stylish decor elements. Whether you have a collection of wooden, marble, or vintage cutting boards, displaying them creatively can add warmth and character to your space. Here are 18 irresistible cutting board display ideas to transform your kitchen into a functional and beautiful space.
1. Layered on the Countertop
Stack cutting boards of different sizes against the backsplash for a rustic yet organized look.
2. Mounted on a Wall Rack
Install a wall-mounted rack or rail with hooks to hang cutting boards vertically.
3. Leaning Against the Backsplash
Simply lean your favorite boards against the backsplash for an effortlessly chic display.
4. Hanging from a Pegboard
A kitchen pegboard provides a customizable and visually appealing way to store and display cutting boards.
5. Displayed on Floating Shelves
Arrange cutting boards on open shelves along with cookbooks and decorative kitchen items.
6. In a Large Basket or Bin
Place a woven basket or metal bin on the countertop to hold cutting boards for easy access.
7. Arranged in a Plate Rack
A vertical plate rack is a clever way to store and showcase cutting boards in an organized manner.
8. Hanging from a Pot Rail
Utilize a pot rail with S-hooks to hang cutting boards alongside pots and utensils.
9. Displayed on a Cookbook Stand
Use a cookbook stand to prop up a decorative cutting board, adding charm to your kitchen.
10. Framed as Wall Art
Mount unique or vintage cutting boards in a frame to create a rustic kitchen art display.
11. Stacked in a Corner Nook
Designate a corner space on your counter for a neatly stacked collection of boards.
12. Hanging Behind the Stove
A stylish and practical way to store cutting boards is by mounting them behind the stove for easy access.
13. Mixed with Wall Decor
Integrate cutting boards into your gallery wall or mix them with kitchen wall art for a cohesive look.
14. Inside a Glass Cabinet
If you have glass-front kitchen cabinets, display cutting boards as part of your organized kitchenware.
15. Standing in a Utensil Crock
Place a couple of small or medium-sized boards inside a decorative utensil holder.
16. Integrated into a Farmhouse-Style Hutch
A rustic hutch can serve as a great space for displaying a curated collection of cutting boards.
17. Grouped by Material and Shape
Organize cutting boards by color, material, or shape for a more structured aesthetic.
18. Floating on Magnetic Strips
Attach a strong magnetic strip to the wall and use it to hold metal-accented cutting boards.
Conclusion
Displaying cutting boards creatively can enhance your kitchen’s style while keeping them within reach for everyday use. Whether you opt for wall-mounted, countertop, or open-shelf displays, these ideas will help you showcase your collection beautifully. Try out these ideas and bring charm and organization to your kitchen!

Fireclay Sinks: Pros and Cons
Introduction
Fireclay sinks have gained popularity in modern and farmhouse-style kitchens due to their durability, classic aesthetic, and low-maintenance appeal. These sinks are crafted by molding clay, drying it at high temperatures, and then glazing and firing it at extreme heat. The result is a sturdy, non-porous, and elegant sink that enhances the beauty and functionality of any kitchen. However, like any home improvement choice, fireclay sinks come with advantages and disadvantages. In this article, we will explore the pros and cons of fireclay sinks to help you decide if they are the right choice for your home.
What is a Fireclay Sink?
A fireclay sink is made from a special type of clay that is molded and fired at high temperatures, typically around 2000°F. The high heat fuses the clay and glaze, creating a highly durable and non-porous surface. Fireclay sinks are often compared to ceramic and porcelain sinks but stand out due to their superior strength and resistance to wear and tear.
Pros of Fireclay Sinks
1. Durability
Fireclay sinks are known for their strength and resilience. They are resistant to chipping, cracking, and scratching, making them a long-lasting choice for busy kitchens.
2. Heat Resistance
Unlike some sink materials that can warp or discolor from hot pots and pans, fireclay sinks can withstand high temperatures without damage. This makes them ideal for heavy-duty kitchen use.
3. Stain and Scratch Resistance
The non-porous surface of fireclay sinks prevents stains from penetrating, keeping the sink looking clean and fresh. Additionally, the tough glaze helps prevent scratches from daily kitchen tasks.
4. Aesthetic Appeal
Fireclay sinks offer a timeless, elegant appearance that complements a variety of kitchen styles, from traditional to contemporary. Their smooth, glossy finish adds a touch of sophistication to any kitchen.
5. Easy to Clean
The non-porous surface makes cleaning simple. Regular maintenance usually involves wiping the sink with a damp cloth and mild detergent. Unlike other materials, fireclay does not require sealing or special treatments.
6. Variety of Styles and Sizes
Fireclay sinks come in different styles, including apron-front (farmhouse), undermount, and drop-in designs. They are also available in various sizes to fit different kitchen layouts and needs.
Cons of Fireclay Sinks
1. Heavy Weight
Fireclay sinks are significantly heavier than stainless steel or composite sinks. This means that additional support may be required during installation, particularly for larger farmhouse-style sinks.
2. Higher Cost
Compared to other sink materials, fireclay sinks are more expensive. Their cost is justified by their durability and aesthetic appeal, but they may not be ideal for budget-conscious homeowners.
3. Limited Color Options
Most fireclay sinks come in neutral colors like white, off-white, and light gray. If you’re looking for a more vibrant or unique color, fireclay may not offer the variety you need.
4. Potential for Chipping
Although fireclay sinks are highly durable, heavy impacts from sharp or heavy objects (like cast iron pans) can cause chips or cracks in the glaze. Care must be taken to avoid dropping heavy kitchenware in the sink.
5. Complex Installation
Installing a fireclay sink can be more challenging than other sink types due to its weight and size. Professional installation is often recommended, which can add to the overall cost.
Fireclay Sinks vs. Other Sink Materials
| Feature | Fireclay | Stainless Steel | Cast Iron | Composite |
|---|---|---|---|---|
| Durability | High | Moderate | High | High |
| Stain Resistance | Excellent | Moderate | Moderate | Excellent |
| Heat Resistance | High | High | High | Moderate |
| Maintenance | Low | Low | Moderate | Low |
| Aesthetic Appeal | Classic & Elegant | Modern & Sleek | Vintage & Timeless | Contemporary & Versatile |
| Cost | Higher | Lower | Moderate | Moderate |
Tips for Maintaining a Fireclay Sink
- Use a Sink Grid: A sink grid can prevent heavy pots and pans from directly hitting the surface, reducing the risk of chipping.
- Avoid Harsh Cleaners: Abrasive cleaning products can damage the glaze over time. Use a gentle dish soap and a soft sponge instead.
- Wipe Down Regularly: To prevent water spots and soap scum, wipe down the sink after each use.
- Handle Heavy Items Carefully: Be cautious when handling heavy cookware to minimize the chance of accidental chips or cracks.
Is a Fireclay Sink Right for You?
Fireclay sinks are an excellent choice for homeowners looking for a durable, elegant, and easy-to-maintain sink option. If you love the look of a farmhouse sink and don’t mind the higher cost and weight, fireclay may be the perfect addition to your kitchen. However, if you are on a tight budget or need a sink in a unique color, you might want to explore other options.
Conclusion
Fireclay sinks offer a combination of style, durability, and practicality, making them a popular choice for modern kitchens. While they come with a higher price tag and require careful handling, their beauty and longevity make them a worthwhile investment. Whether you are renovating your kitchen or designing a new space, a fireclay sink can be a stunning and functional centerpiece that enhances your home’s overall appeal.
How to Select Paint Sheens for Every Room in Your Home?
Introduction
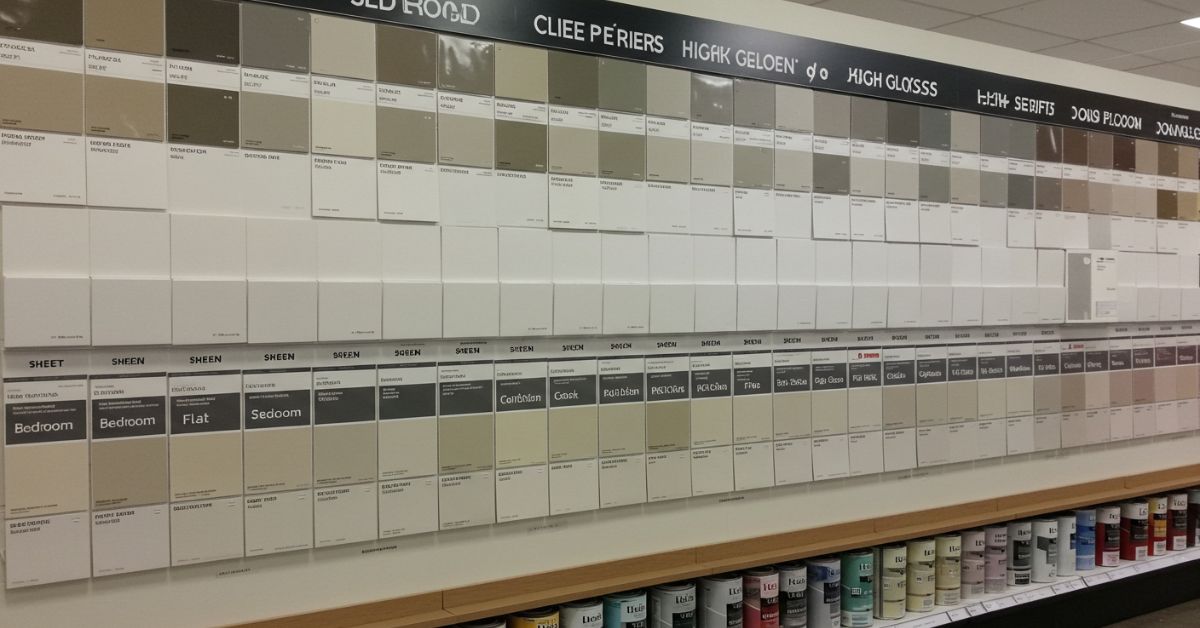
Choosing the right paint color is important, but selecting the correct paint sheen is just as crucial. Paint sheen affects the durability, appearance, and maintenance of your walls. The right finish can enhance the beauty of a room while providing the necessary protection against wear and tear. In this guide, we’ll explore different types of paint sheens and where to use them in your home.
Understanding Paint Sheen Levels
Paint sheens range from flat to high-gloss, each offering different levels of durability and light reflection. Here’s a breakdown of common sheen types:
- Flat/Matte (No Shine)
- Best for: Ceilings, low-traffic areas, and walls with imperfections.
- Pros: Hides surface flaws, absorbs light, and provides a soft, elegant look.
- Cons: Less washable; can show scuff marks easily.
- Eggshell (Low Sheen)
- Best for: Living rooms, bedrooms, and dining rooms.
- Pros: Slightly more durable than flat paint, easy to clean, and offers a soft glow.
- Cons: Not as resistant to heavy scrubbing.
- Satin (Soft Sheen)
- Best for: Kitchens, bathrooms, hallways, and high-traffic areas.
- Pros: Durable, easy to clean, and has a smooth finish with a slight sheen.
- Cons: Can highlight surface imperfections.
- Semi-Gloss (Moderate Shine)
- Best for: Doors, trim, cabinets, and moisture-prone areas.
- Pros: Highly durable, easy to wipe clean, and resists moisture and stains.
- Cons: Shows imperfections and brush strokes.
- Gloss/High-Gloss (Shiny & Reflective)
- Best for: Furniture, trim, cabinets, and accent pieces.
- Pros: Extremely durable, stain-resistant, and easy to clean.
- Cons: Reflects light, making imperfections more noticeable.
Choosing the Right Sheen for Each Room
Living Room & Bedrooms
- Best sheen: Eggshell or satin
- Why? These rooms typically experience moderate wear. Eggshell provides a soft, elegant finish, while satin offers added durability for households with kids or pets.
Kitchen & Bathroom
- Best sheen: Satin or semi-gloss
- Why? These areas require a moisture-resistant and easy-to-clean finish. Satin works well for walls, while semi-gloss is ideal for cabinets and trim.
Hallways & High-Traffic Areas
- Best sheen: Satin
- Why? Satin holds up well to frequent cleaning and provides a balance between durability and aesthetics.
Doors, Trim, & Cabinets
- Best sheen: Semi-gloss or high-gloss
- Why? These surfaces need a durable, easy-to-clean finish that resists scuffs and fingerprints.
Ceilings
- Best sheen: Flat/matte
- Why? A flat finish absorbs light, reducing glare and hiding imperfections, making it the best choice for ceilings.
Tips for Choosing the Right Sheen
- Consider durability needs – High-traffic areas require a more durable sheen, while low-traffic areas can have a matte finish.
- Think about lighting – Glossier sheens reflect more light and can brighten up darker rooms.
- Test before committing – Sample different sheens on a small area to see how they look in your space.
- Balance aesthetics and maintenance – While higher sheens are easier to clean, they may highlight surface imperfections.
Conclusion
Selecting the right paint sheen is essential for achieving both functionality and aesthetics in your home. By understanding how different sheens perform, you can make an informed decision that enhances each room’s appearance while ensuring long-term durability. Whether you prefer a soft, subtle look or a sleek, high-gloss finish, choosing the right sheen will make all the difference in your home’s interior design.

A Fresh Perspective on Home Decor: Innovative Design Solutions for Modern Homes
Introduction
Home decor is constantly evolving, with new trends and innovative solutions emerging to suit modern lifestyles. Whether you’re looking to revamp your living space or create a stylish and functional environment, incorporating fresh design perspectives can make a significant impact. Here are some cutting-edge ideas to transform your home into a contemporary haven.
1. Embrace Minimalist Aesthetics
Modern homes benefit from a clean and clutter-free design that emphasizes simplicity and functionality.
- Opt for neutral color palettes to create a serene atmosphere.
- Invest in multi-functional furniture to maximize space and usability.
- Incorporate open shelving for a streamlined and organized look.
2. Smart Home Integration
Technology is shaping modern interiors, making homes more convenient and efficient.
- Install smart lighting systems to adjust ambiance with ease.
- Use voice-controlled devices for seamless automation.
- Upgrade to smart thermostats and security systems for enhanced comfort and safety.
3. Sustainable and Eco-Friendly Design
Sustainability is at the forefront of contemporary home decor, emphasizing environmentally conscious choices.
- Choose sustainable materials like bamboo, reclaimed wood, and recycled metals.
- Incorporate energy-efficient appliances to reduce carbon footprints.
- Use indoor plants to improve air quality and bring a touch of nature indoors.
4. Mix Vintage with Modern
Blending classic and contemporary styles adds character and uniqueness to any space.
- Pair vintage furniture with sleek, modern decor for contrast.
- Use antique statement pieces to create focal points.
- Experiment with textures and materials to achieve a balanced look.
5. Bold Accents and Statement Pieces
A modern home thrives on striking details that reflect personal style.
- Add a pop of color through accent walls, vibrant artwork, or bold furniture.
- Use geometric patterns and abstract designs to make spaces visually interesting.
- Experiment with lighting fixtures like pendant lights and chandeliers to enhance ambiance.
6. Open Concept Living Spaces
Breaking down barriers in home design fosters connectivity and a sense of openness.
- Create fluid transitions between the kitchen, dining, and living areas.
- Use glass partitions or sliding doors for a spacious feel.
- Maximize natural light with large windows and strategically placed mirrors.
7. Personalized and Artistic Touches
Modern homes should reflect individuality through unique design choices.
- Incorporate DIY decor projects for a custom feel.
- Showcase personal artwork and photography to make spaces more meaningful.
- Use customizable furniture and decor to adapt spaces to changing needs.
Conclusion
Innovative design solutions can breathe new life into modern homes, making them more stylish, functional, and personalized. Whether you embrace smart technology, sustainable materials, or bold design elements, a fresh perspective on home decor can elevate your living space to the next level.
Simple Ways to Spruce Up Any Room in Your Home
Introduction
Your home is a reflection of your personality and style. Whether you’re looking to refresh a tired space or simply want to enhance the ambiance, there are plenty of simple and affordable ways to spruce up any room. From minor décor changes to strategic furniture rearrangements, small updates can make a big difference. Here are some easy and effective ideas to give your space a fresh, inviting look.
1. Add a Splash of Color
One of the quickest ways to transform a room is by introducing color. Whether through paint, accent walls, or decorative accessories, color can significantly impact the mood of a space.
- Paint an accent wall to create a focal point.
- Incorporate colorful throw pillows, rugs, or curtains to brighten up the room.
- Use artwork or framed prints to add personality and charm.
2. Rearrange Your Furniture
A simple yet effective way to refresh a space is by rearranging the furniture. Moving pieces around can create better flow and functionality.
- Consider the layout and how people move through the room.
- Create cozy conversation areas by repositioning chairs and sofas.
- Maximize natural light by ensuring furniture doesn’t block windows.
3. Incorporate Greenery
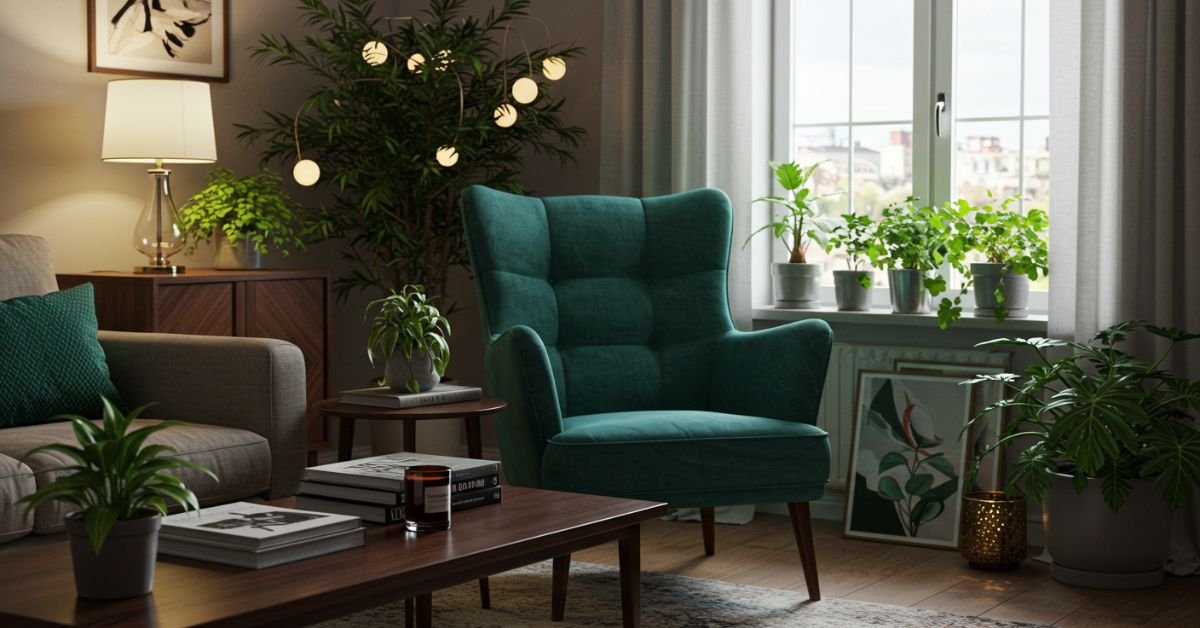
Adding plants to your space brings life, color, and freshness to any room. Whether you have a green thumb or prefer low-maintenance options, there are plenty of choices.
- Use potted plants or hanging planters to create a natural vibe.
- Opt for easy-care plants like succulents, snake plants, or pothos.
- Incorporate fresh flowers in vases for a seasonal touch.
4. Upgrade Lighting
Lighting plays a crucial role in setting the mood of a room. Updating light fixtures or incorporating different sources of lighting can instantly enhance the ambiance.
- Add floor or table lamps for softer, layered lighting.
- Install dimmers to adjust brightness according to your needs.
- Use LED strip lights or fairy lights for a cozy and stylish effect.
5. Declutter and Organize
A clutter-free space feels more open and inviting. Simple decluttering and organizing techniques can transform a room instantly.
- Invest in storage solutions like baskets, shelves, or multi-functional furniture.
- Declutter surfaces by removing unnecessary items.
- Adopt a minimalist approach to keep things neat and tidy.
6. Swap Out Accessories
Refreshing your décor doesn’t have to mean a complete makeover. Swapping out accessories can create a new look with minimal effort.
- Change cushion covers, bed linens, or curtains for a fresh feel.
- Update hardware such as cabinet knobs, handles, and faucets for a subtle yet impactful change.
- Incorporate seasonal décor like cozy throws in winter or bright florals in summer.
7. Add Mirrors for Depth and Light
Mirrors can make a room appear larger and brighter by reflecting light.
- Place a large mirror opposite a window to maximize natural light.
- Use decorative mirrors as statement pieces on walls.
- Experiment with different shapes and sizes to enhance visual interest.
8. Personalize with DIY Projects
Adding personal touches through DIY projects can give your space a unique and meaningful update.
- Create a gallery wall with personal photos or artwork.
- Repurpose old furniture with a fresh coat of paint or new upholstery.
- Make custom decorative pieces like candles, vases, or wall art.
Conclusion
Sprucing up a room doesn’t have to be expensive or time-consuming. With small changes like adding color, updating accessories, improving lighting, and incorporating greenery, you can easily refresh any space. Whether you opt for a simple decluttering session or a DIY project, these ideas will help you create a cozy and stylish home environment.
A Complete Guide to Bathroom Lighting Zones: Choosing the Right Lights for Safety and Style
Introduction
Bathroom lighting is essential for both functionality and aesthetics. Choosing the right lights ensures safety in moisture-prone areas while enhancing the overall ambiance of your space.
Understanding bathroom lighting zones will help you select the best fixtures that comply with regulations and suit your design preferences.
1. Understanding Bathroom Lighting Zones
Bathrooms are divided into lighting zones based on their exposure to water. These zones determine the type of lighting that can be safely installed.
Zone 0 (Inside the Bath or Shower)
- Located inside the bath or shower tray.
- Required Rating: IP67 or higher (fully waterproof and submersible).
- Recommended Lights: Waterproof LED lights designed for submersion.
Zone 1 (Above the Bath or Shower)
- Covers the area directly above the bath or shower up to 2.25m from the floor.
- Required Rating: IP65 (protected against water jets).
- Recommended Lights: Recessed ceiling spotlights or moisture-resistant pendant lights.
Zone 2 (Around the Bath, Shower, and Sink)
- Extends 0.6m around the bath, shower, and sink, and up to 2.25m high.
- Required Rating: IP44 (protected against splashes of water).
- Recommended Lights: Wall-mounted sconces, vanity lights, or LED downlights.
Outside Zones (General Bathroom Area)
- Areas beyond Zone 2, where water exposure is minimal.
- Required Rating: IP20 or higher (if away from direct water contact).
- Recommended Lights: Ceiling fixtures, decorative wall sconces, and ambient lighting.
2. Types of Bathroom Lighting
Task Lighting
Provides focused illumination for daily grooming activities.
- Best used around mirrors and vanity areas.
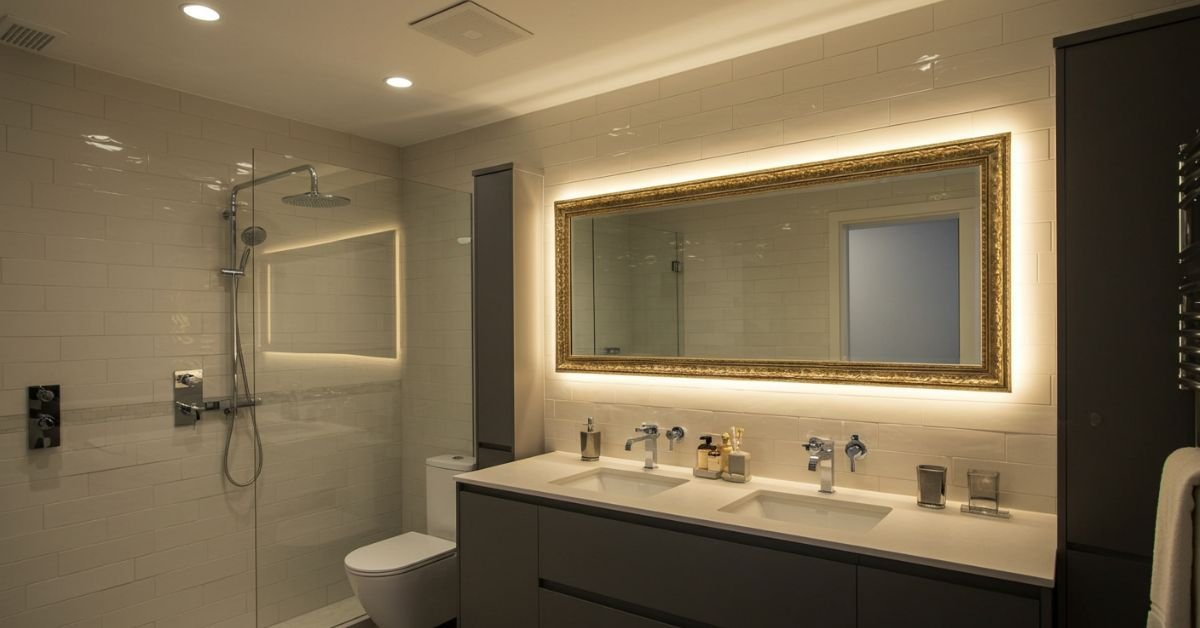
- Ideal Choices: LED mirror lights, backlit mirrors, and adjustable wall-mounted sconces.
Ambient Lighting
Creates overall brightness and enhances the room’s atmosphere.
- Soft, warm lighting makes the space feel inviting.
- Ideal Choices: Flush-mount ceiling lights, pendant fixtures, and dimmable LEDs.
Accent Lighting
Adds depth and highlights architectural features.
- Used for decorative purposes to enhance the design.
- Ideal Choices: LED strip lights under cabinets, recessed shelving lights, and cove lighting.
3. Choosing the Right Bulbs
The type of bulb you select impacts brightness, energy efficiency, and mood.
LED vs. Halogen vs. CFL
- LED Bulbs: Energy-efficient, long-lasting, and available in various color temperatures.
- Halogen Bulbs: Provide warm, natural light but consume more energy.
- CFL Bulbs: More energy-efficient than halogens but take time to reach full brightness.
Color Temperature Recommendations
- Cool White (4000K-5000K): Ideal for task lighting around mirrors.
- Warm White (2700K-3000K): Best for ambient lighting to create a cozy feel.
- Daylight (5000K-6500K): Mimics natural light for precision tasks.
4. Safety Considerations for Bathroom Lighting
- Always choose lighting with the appropriate IP rating for the zone.
- Ensure electrical work is carried out by a licensed professional to comply with safety standards.
- Install dimmable options for flexibility in brightness and ambiance.
5. Bathroom Lighting Design Tips
- Layer your lighting: Combine task, ambient, and accent lights for a balanced look.
- Use mirrors strategically: Reflective surfaces amplify brightness.
- Opt for smart lighting controls: Motion sensors and dimmers enhance convenience and energy efficiency.
- Stick to moisture-resistant fixtures: Protect against humidity and prolong the lifespan of your lighting.
Conclusion
Choosing the right bathroom lighting involves understanding zoning regulations, selecting suitable fixtures, and incorporating different lighting layers.
By considering safety, style, and functionality, you can create a well-lit, visually appealing, and practical bathroom space.
The Ultimate Guide to Choosing the Perfect Leather Lounge for Your Home
Introduction
A leather lounge is a timeless and luxurious addition to any home, offering both comfort and style. Choosing the right one requires careful consideration of factors such as material quality, size, design, and functionality.
This guide will help you navigate the key aspects of selecting the perfect leather lounge for your space.
1. Determine Your Space and Layout
Before purchasing a leather lounge, consider the available space and the layout of your room:
- Measure Your Room – Ensure the lounge fits comfortably without overcrowding.
- Consider Room Flow – Position the lounge to enhance movement and accessibility.
- Choose the Right Shape – Options include sectional sofas, L-shaped lounges, or classic three-seaters.
2. Select the Right Leather Type
Leather lounges come in various types, each offering different levels of durability and aesthetics:
- Full-Grain Leather – The highest quality, known for its durability and natural texture.
- Top-Grain Leather – Slightly processed for a smoother finish while maintaining strength.
- Genuine Leather – A more affordable option, though less durable.
- Bonded Leather – Made from leather scraps, offering a budget-friendly alternative.
3. Consider Style and Design
Your leather lounge should complement your home’s aesthetic. Popular styles include:
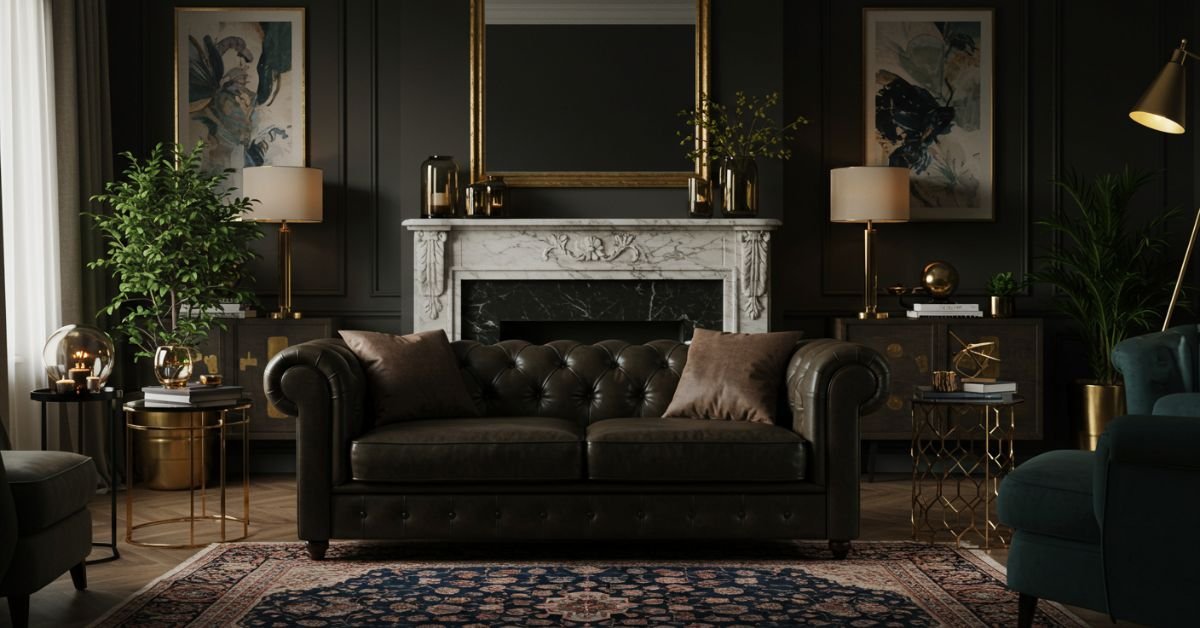
- Classic Chesterfield – A timeless option with tufted detailing and rolled arms.
- Modern Minimalist – Sleek, clean lines with a contemporary feel.
- Mid-Century Design – Features tapered wooden legs and a vintage charm.
- Reclining Lounges – Ideal for relaxation with adjustable backrests and footrests.
4. Evaluate Comfort and Cushioning
Comfort is crucial when selecting a leather lounge. Look for:
- High-Density Foam – Provides firm support and maintains shape over time.
- Feather-Filled Cushions – Offer plush, sink-in comfort.
- Adjustable Headrests and Armrests – Enhance ergonomic support.
- Deep-Seated vs. Standard Seating – Choose based on your lounging preference.
5. Check Frame and Build Quality
A sturdy frame ensures longevity and durability. Consider:
- Solid Hardwood Frames – The best option for long-lasting support.
- Metal Frames – Lightweight yet strong, often used in modern designs.
- Joint Construction – Look for reinforced joints for added durability.
6. Choose the Right Color and Finish
The color of your leather lounge can significantly impact your room’s ambiance:
- Classic Black or Brown – Timeless and versatile.
- Neutral Tones (Beige, Gray, White) – Ideal for modern and minimalist spaces.
- Bold Colors (Navy, Emerald, Red) – Make a statement and add personality.
7. Maintenance and Care Tips
Leather lounges require proper care to maintain their beauty and longevity:
- Regular Cleaning – Wipe with a soft cloth to remove dust and spills.
- Conditioning – Use leather conditioner to prevent drying and cracking.
- Avoid Direct Sunlight – Prevents fading and maintains color integrity.
- Use Protective Covers – Helps minimize wear and tear in high-traffic areas.
Conclusion
Choosing the perfect leather lounge for your home involves balancing style, comfort, durability, and maintenance.
By considering factors such as size, leather type, design, and frame quality, you can find a piece that enhances your space while providing years of luxury and relaxation.
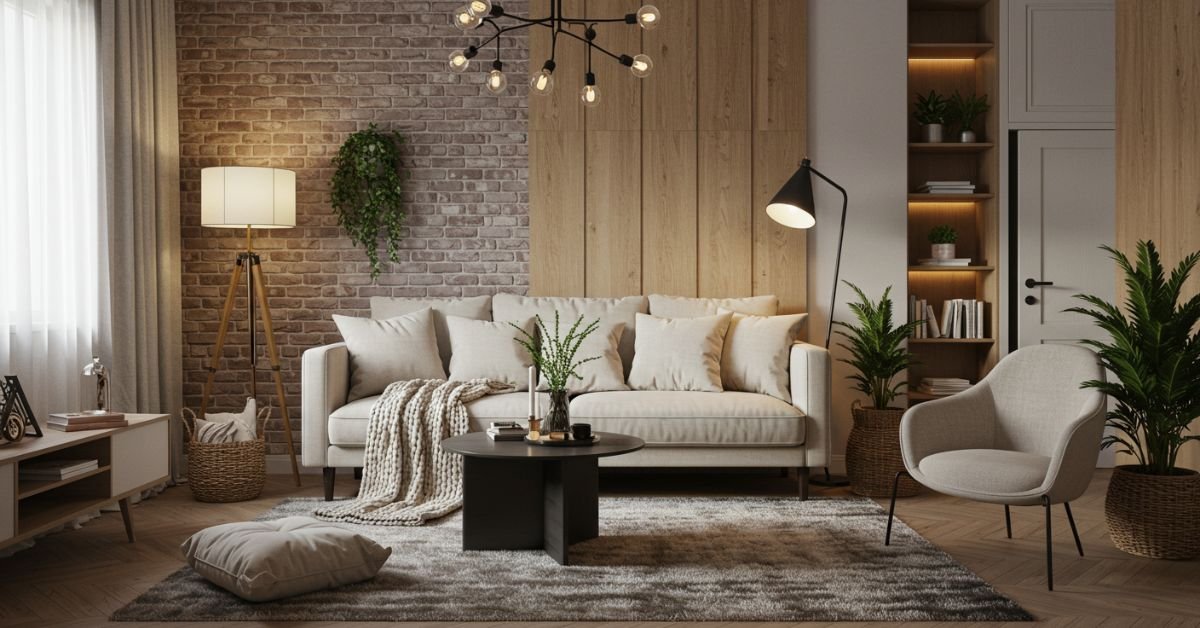
Transform Your Space: The Ultimate Guide to Home Décor Trends & Tips
Introduction
Your home is more than just a place to live—it’s a reflection of your personality, style, and comfort.
Whether you’re looking to refresh a single room or completely revamp your space, staying updated with the latest home décor trends and timeless design tips can make all the difference.
From minimalist aesthetics to bold statement pieces, this guide will take you through the hottest home décor trends, expert styling tips, and practical ideas to help you create a space that’s both stylish and functional.
Top Home Décor Trends of the Year
1. Earthy & Nature-Inspired Elements 🌿
Bringing nature indoors is one of the biggest trends in home décor. Think organic materials, earthy tones, and biophilic design.
How to Achieve the Look:
✅ Incorporate wood, stone, rattan, and linen into furniture and décor.
✅ Choose earthy color palettes—warm browns, soft greens, and neutral beiges.
✅ Add indoor plants like fiddle leaf figs, snake plants, or hanging pothos.
🌱 Pro Tip: Use natural fiber rugs, bamboo blinds, or wooden shelves to create a warm, inviting space.
2. Modern Minimalism Meets Comfort 🏡
Minimalism is evolving to be more cozy and functional, moving beyond stark white spaces to warm neutrals, soft textures, and simple yet meaningful designs.
How to Achieve the Look:
✅ Stick to a neutral color scheme (off-whites, taupe, muted grays).
✅ Choose furniture with clean lines but soft, inviting fabrics.
✅ Keep décor intentional—declutter unnecessary items while adding a few personal touches.
🛋️ Pro Tip: Opt for a statement sofa with plush cushions to balance minimalist aesthetics with comfort.
3. Bold & Eclectic Statement Pieces 🎨
While minimalism reigns, bold and vibrant accents are making a comeback, especially in the form of unique statement pieces and mixed patterns.
How to Achieve the Look:
✅ Use vibrant artwork, patterned rugs, or colorful throw pillows to add personality.
✅ Experiment with vintage and modern décor pairings for a curated look.
✅ Mix metallic finishes (gold, brass, or matte black) for added contrast.
🎭 Pro Tip: A gallery wall with mismatched frames is an easy way to embrace this trend without overwhelming your space.
4. Sustainable & Eco-Friendly Home Décor 🌍
More homeowners are embracing sustainability, choosing eco-friendly materials, second-hand finds, and energy-efficient designs.
How to Achieve the Look:
✅ Shop for furniture made from recycled or reclaimed wood.
✅ Use LED lighting and energy-efficient smart home technology.
✅ Support local artisans and handmade décor instead of mass-produced items.
🌱 Pro Tip: Repurpose old furniture with DIY upcycling projects instead of buying new pieces.
5. Multi-Functional Spaces & Smart Storage Solutions 📦
With remote work and smaller living spaces becoming more common, designing multi-functional areas is key to making the most of every inch of your home.
How to Achieve the Look:
✅ Invest in multi-purpose furniture—foldable desks, storage ottomans, and sleeper sofas.
✅ Use vertical storage solutions like floating shelves and wall organizers.
✅ Create zoned areas using rugs or dividers to separate spaces.
📚 Pro Tip: A murphy bed or hidden storage cabinet is perfect for maximizing small spaces.
Expert Home Décor Tips for Every Room
🛋️ Living Room: Make It Inviting & Functional
✔️ Use layered lighting—combine floor lamps, pendant lights, and table lamps for warmth.
✔️ Add textured elements like soft throw blankets, velvet cushions, or woven baskets.
✔️ Incorporate mirrors to create the illusion of a larger space.
🛏️ Bedroom: Create a Cozy Retreat
✔️ Opt for calming colors like soft blues, greens, or warm neutrals.
✔️ Use plush bedding and layered textiles for a luxurious feel.
✔️ Keep bedside tables clutter-free with minimal, meaningful décor.
🍽️ Kitchen: Balance Style & Functionality
✔️ Upgrade hardware with brushed nickel, brass, or matte black finishes.
✔️ Add open shelving to display stylish dishware and greenery.
✔️ Use under-cabinet lighting for a modern touch.
🚿 Bathroom: Spa-Like Serenity
✔️ Incorporate natural stone or wood elements for a spa feel.
✔️ Swap out outdated fixtures for sleek, modern finishes.
✔️ Use scented candles or diffusers to enhance relaxation.
Final Thoughts: Your Dream Space Awaits!
Whether you’re making small updates or a full makeover, home décor should reflect your personal style and functional needs. By incorporating trendy yet timeless elements, your space will feel fresh, cozy, and inspiring.
✨ Start today—experiment with colors, textures, and smart designs to create a home you love! 🏡💖